What points should I pay attention to when setting the sample on the microscope? In addition, how can I focus quickly? By holding the point, it is possible to focus accurately in a short time.
Using the microscope (upright)
Set the sample
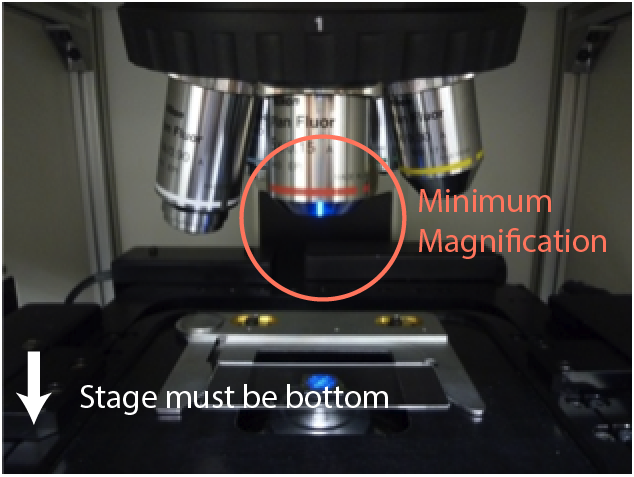
When setting the sample, change the objective lens to the lowest magnification. Also, the stage position must be bottom. Place the prepared sample on a slide glass and set it on the stage.
Move the sample or XY stage so that the area of the sample you want to measure is located directly below the lens. At this time, using the reflected illumination light makes it easy to visually identify the area directly below the lens.
Focus adjustment procedure
Bring the sample surface as close to the objective as possible visually. Adjust the illumination light intensity and look for the focal position while lowering the stage. This prevents collisions between the objective and the sample. If the sample is transparent it is also possible to use transmitted illumination. If there is a foreign substance, it will be easy to identify because the contrast is obtained.
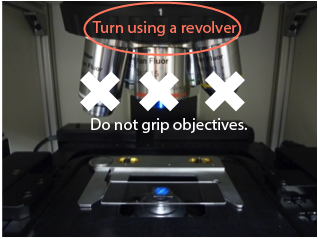
If focus is achieved at low magnification, the magnification will be increased sequentially. To change the objective lens, turn the objective lens revolver. Do not hold the objective lens itself and turn it.
How to focus quickly
Marker for focus adjustment
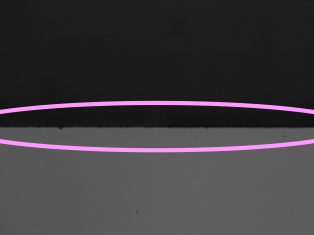
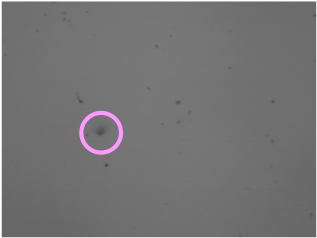
When focusing, use the edge or dust of the sample. Even when measuring with a high-magnification lens, focusing from low magnification can result in a short time.
Focusing by using laser light
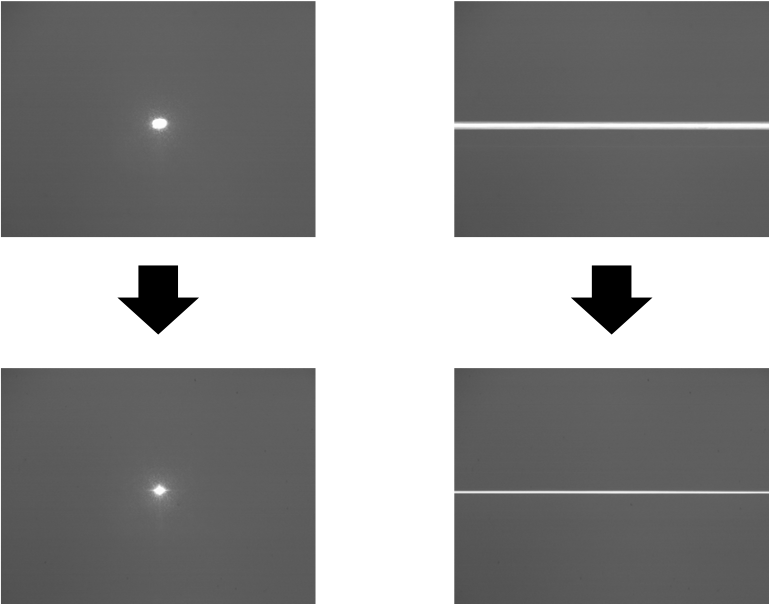
After focusing roughly on the optical microscope image, perform the final fine adjustment (focusing) using a laser beam. Apply the lowest power laser and adjust the stage up and down so that the spot size is minimized. If the measurement is repeated, the heat from the laser beam may shift the focus even if the sample is not moved. Therefore, it is possible to make sure that the laser light is in focus once it is in focus before measurement.
Focusing the transparent sample
In the case of transparent films or samples through the observation window, you need to be careful when focusing. That’s because there is a position where the focus comes in multiple times. For example, a clear film will focus twice on the front and back of the film. When measuring a sample through the observation window, the front side, back side of the observation window and the sample surface are focused three times in total. In these cases as well, the basics are the same. After bringing the objective lens and sample as close as possible visually, the stage will be lowered. The first focus position will probably be the deepest in the sample. Using this position as a reference, lower the stage further, check the in-focus position and the number of times, and identify the first focus position. If the first focus position is not on the deepest side, I think that there is enough thickness to focus on in the first place. If you try to find the focus by force, you may stop the objective lens on the sample.